Hard Boiled Egg Place Cards
Hard boiled eggs are one of those foods that are hit or miss- people either love them or hate them, I hate them. I don't particularly love eggs in and of themselves, but the smell of hard boiled eggs does me in. Besides the fact that hard boiled eggs are an edible option, they have also become a fun activity of decoration during the Easter holiday. This year we opted for a decorative and functional hard boiled egg- I kept my opinion of eating hard boiled eggs to myself, as I always encourage my kids to make their own opinions regarding food and while boiling the eggs yesterday Cole asked me if we eat these. I asked him why he would suddenly ask if these particular ones were edible since he eats eggs regularly and his reply in a scrunched up face was, Because these are really stinky!! It is true- so if you haven't made hard boiled eggs before, be prepared- but have fun while doing it!
To get started we carefully placed our eggs in a large pot, making sure to not place too many to where they would touch and crack while boiling.
Fill the pot with just enough water to cover the eggs.
Place the pot on the stove and boil over medium-high heat until a rolling boil is achieved. Once this happens, remove the pot from the stove and turn off the heat. If you let the eggs boil to high or long they will crack. Let the eggs cool.
We decided to keep our eggs simple this year. We were going to use stickers and a white crayon. The stickers would create a shape on the egg when placed in the dye and the white crayon would be used to write our attending guests names on the eggs for our Easter brunch.
We filled 3 bowls with water and then food coloring.
Now that our eggs had cooled, we softly patted them dry after a quick rinse and set them aside to color.
We began by placing some stickers on our egg, softly pressing down on all sides to make sure the dye didn't seep under the sticker. Then take your white crayon and write the names of your guests on the egg.
Use a spoon or egg dipper to submerge the egg in the food coloring.
After a few moments remove the egg to reveal the written name and softly pat dry to remove the excess of colored water.
Gently peel off the stickers to also reveal the design- on this egg, they were hearts.
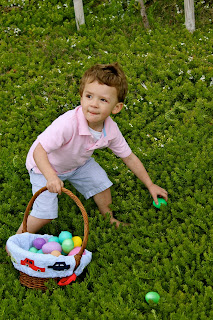
Continue the process until all of your eggs have been decorated and colored. Cole was a great helper!
We made sure to write all the names of our Easter brunch attendees.
With the remaining eggs, Cole used the white crayon to draw his own shapes and designs and picked the colors he wanted the eggs to be.
Ta-da! A simple, yet fun Easter activity to do with your little ones! Our eggs will act as edible place cards Easter morning- I love that they are multi-functional, the best kind!!
Enjoy your Easter celebration and lets remember the REAL reason to why we celebrate!!
Sure- family gathered together, good food, egg hunts, cute church outfits, and visits to see the Easter bunny are all great and fun to partake it- but lets not forget that the real reason we celebrate is because our Lord has risen! Let us rejoice in that wonderful truth!!
"I am the resurrection and the life. He who believes in Me, though he may die, he shall live. And whoever lives and believes in Me shall never die."
-- John 11:25-26
"For God so loved the world that he gave his one and only Son, that whoever believes in him shall not perish but have eternal life."
-- John 3:16 NIV
"He is not here: for he is risen, as he said. Come, see the place where the Lord lay. And go quickly, and tell his disciples that he is risen from the dead; and, behold, he goeth before you into Galilee; there shall ye see him: lo, I have told you. And they departed quickly from the sepulchre with fear and great joy; and did run to bring his disciples word. And as they went to tell his disciples, behold, Jesus met them, saying, All hail. And they came and held him by the feet, and worshipped him. Then said Jesus unto them, Be not afraid: go tell my brethren that they go into Galilee, and there shall they see me."
-- Matthew 28: 6-10 KJV


