Wednesday, October 26, 2011

Maple Bundt Cake with Meringue Topping


Maple Bundt Cake with Meringue Topping

We love coffee cake in our house, but I thought I would try something a little different for breakfast today.  Maple has a great breakfast flavor so that was the inspiration.

In a bowl combine 2 c flour, 2 tsp baking powder and 1/2 tsp baking soda.

In a separate bowl place 1 1/2 sticks of softened butter to begin mixing.  Add 1/2 c packed brown sugar to the blended butter.  One at a time add 2 eggs and then 1/2 c of maple syrup as well as 2 tsp vanilla.  Once all mixed together add the dry ingredients with a cup of sour cream in rotating additions until all is well incorporated.

Preheat the oven to 350 degrees.  Prepare a bundt pan and pour the batter evenly into the pan.  Bake for 35 minutes.

Let cool for 15 minutes and remove from pan to cool a few more minutes.

To make the meringue use an electric mixer and beat 3 egg whites and 1/4 tsp vanilla on high until soft peeks form.  Add 1/3 c sugar and continue to beat on high until the peeks are stiff.  Use a spatula to scoop the meringue onto the cake.

I placed the cake on a cookie sheet and set my oven to broil.  Place the cake in the oven for only a few minutes- just long enough for the meringue to brown.  I drizzled a little maple syrup on top of the meringue right after as well.

Cool, slice and enjoy!

Monday, October 24, 2011

Dulce De Leche


Dulce De Leche

I came across this idea and I couldn't help but try it to confirm that it ACTUALLY worked and now that I know it does I HAVE to share it with you all!  

Take a can of sweetened condensed milk ...


Peel the wrapper off and wash the outside ...


Fill your crock pot with enough water to completely cover your can ...


and let it sit on low for 8 hours.  Remove the can and let it cool completely in your frig.  Once cool, open the can and you have dulce de leche ... AMAZING!  

We have ours for ice cream toppings, filling for ebelskivers and to dip our marshmallows in- what will you use your's for??!


Saturday, October 22, 2011

Spiced Pumpkin Pancakes

Spiced Pumpkin Pancakes

Earlier in the week the boys and I made pancakes for breakfast.  Considering it is Fall, it seemed appropriate to have fun and add a bit of Fall flare to our pancakes- a few cookies cutters, our pancake pen and some pumpkin became spiced pumpkin  pancakes!


We got our ingredients and equipment ready ...


we can't forget my cute helpers in their pjs and bed hair!

To get started, whisk together 1 1/4 c flour, 3 tbsp sugar, 2 tsp baking powder, and 1 1/4 tsp pumpkin pie spice.


In a separate bowl, combine 1 1/3 c milk, 3/4 c pumpkin, 4 eggs, 1/4 c melted butter, and 1 tsp vanilla.


Add the pumpkin mixture to the dry ingredients, whisking until smooth.


Heat your skillet and oil the insides of your cookie cutters so that the batter doesn't stick to them while cooking.  If you have a pancake pen, fill it with your batter- if not, prepare your batter to fill the cookie cutters.  While the skillet was heating, Braydon's hunger took over and he began to lick the counter- totally gross.


Place your cookie cutters on your heated skillet and pour the batter inside, about half full.


When the batter begins to form bubbles, gently remove the cookie cutters.  Remember that the cookie cutters will be hot too, so I used tongs to remove them so I didn't get burned.


Flip your pancakes, and repeat until all your batter has been used!   Our leaf and pumpkin shaped pancakes put us in the fall mood we were hoping for!


Cheesecake Filled Stawberries

Cheesecake Filled Strawberries


I saw this idea and had to try it for myself.  They are super easy, super yummy and I think they look great too- a yummy dessert that doesn't lack in any way.  Thanks to my hubby for being my strawberry model for the pic!

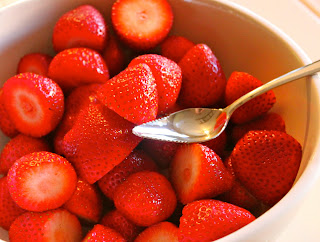
To get started, wash and cut the stems off of your strawberries.  


Next you will need to remove the center of the strawberry- I used a grapefruit spoon but you can use a small knife too.


With the strawberries now cut out, time to make the cheesecake filling.


This part is real easy. Beat 8 ounces of softened cream cheese.  Add 1/2 c of powdered sugar and 1 tsp vanilla until smooth.


If you have a piping bag you can use this to fill your strawberries.  I was trying to finish this while making dinner last night so I just went with easy and convenient- I used the boy's small toddler spoons and scooped it right into the strawberries. 


I then took a package of graham crackers, placed them into a ziploc bag and crushed them.  


Once my strawberries were filled, I then dipped the tops into the graham cracker.


I add chocolate to everything.  If you are a fan of chocolate too, go ahead with this step.  I poured about 3/4 c of chocolate chips in a microwave safe bowl and cooked them at half the power for a minute, stirred and microwaved another 30 seconds, still using half power to melt my chocolate.  If you do not lower the power on your microwave, the chocolate will burn!


Once fully melted, I placed a dollop of chocolate on top of each strawberry.  I covered them and let them chill in the refrigerator until after dinner.  It was a great, light and perfect bite size treat!


Sunday, October 2, 2011

Rice Krispy Treats, Pumpkin Shaped


Rice Krispy Treats, Pumpkin Shaped

I know that rice krispy treats aren't new or that the recipe is hard to find, but I am blogging this particular recipe because it is made with oil, not butter.  I have made these MANY times before and NO ONE can tell the difference- they all assume it is made with butter.  What is better than a treat that taste like its made with butter, but isn't??  A recipe that uses the microwave and not the stove, yep its true!!

In a large microwave safe bowl pour a 10 oz bag of marshmallows in with 3 tbsp of oil.  Microwave for 1 minute and stir.  Microwave for 30 more seconds.  

Add 5 1/2 c rice krispy cereal and stir until the marshmallow and cereal have been well incorporated.  

Spray a 8x8 pan for thicker treats or a 9x13 pan for thinner treats.  Drop the rice kispy treats into the pan.  I like to use a piece of wax paper to press the treats into the pan so that they do not stick to my hands while doing so.

Enjoy!

For pumpkin shaped treats ...

after the marshmallows have been microwaved for a minute with oil, stirred and microwaved 30 more seconds, add orange food coloring.  I used about 3 drops of red and 2 drops of yellow.  Stir well.  Then add the 5 1/2 c of cereal.  An orange color will appear once done stirring all together.

Because the treats are so sticky, I used an ice cream scoop to scoop out my treats and softly formed them into circles.  
I used green licorice, you can also use green gumdrops if you would like.  Gently press the green candy of your choice into the center of the pumpkins.  Finish by piping green frosting along the sides to give your treats a complete pumpkin look!